
Installing and Running Virtualbox on Linux Mint: A proof of concept
My Diploma of IT required me to create and configure virtual machines. So let’s install Virtualbox and configure a test VM on Linux Mint 20.3.
This tutorial was adapted from excellent guides from linoxide, phoenixnap and the virtualbox install docs.
Installing Virtualbox:
Method 1 (from the Ubuntu core repositories):
Pros: Easy. Central package, easy install for the guest additions.
Cons: Not the latest software 6.1.26 vs 6.1.32 as of writing.
sudo apt install virtualbox virtualbox-ext-pack
Method 2 (from Oracle repositories):
Pros: Most up to date software. Newer features.
Cons: More complex installation. Guest additions manual install.
Firstly download and import the virtualbox gpg signing key
wget -q https://www.virtualbox.org/download/oracle_vbox_2016.asc -O- | sudo apt-key add -
Next, add the .deb respository to the list of sources at
/etc/apt/sources.list.d:
echo "deb [arch=amd64] http://virtualbox.org/virtualbox/debian focal contrib" | sudo tee /etc/apt/sources.list.d/virtualbox.list
You will have to change focal to your ubuntu version code name.
Now update and install the latest version of virtualbox.
sudo apt update && sudo apt install virtualbox-6.1
Lastly, manually install the additions.
# Download the additions
wget https://download.virtualbox.org/virtualbox/6.1.8/Oracle_VM_VirtualBox_Extension_Pack-6.1.32.vbox-extpack
# Install the additions
sudo VBoxManage extpack install Oracle_VM_VirtualBox_Extension_Pack-6.1.32.vbox-extpack
Result
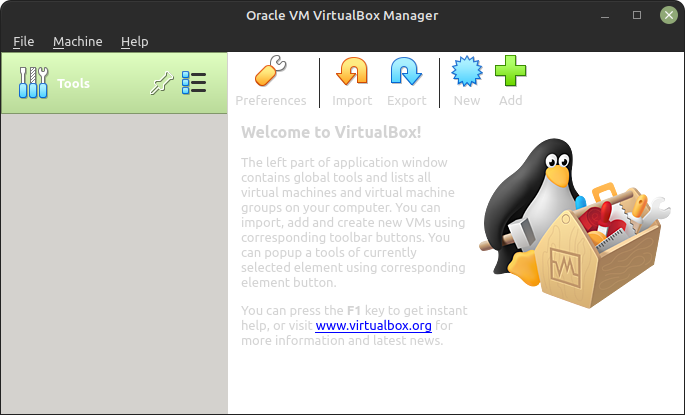
By running virtualbox in the terminal, or finding Virtualbox in the start menu, you should see something like this:
Setting up a test VM:
We will nest a VM as a good test point.
Get the .iso file:
Firstly download the .iso file for the Latest Linux mint here. I’m using Linux Mint Cinnamon 20.3 at the time of writing. Select the torrent option for the fastest download speed.
Remember to verify the hash of your iso using SHA256. Get the sha256sum.txt file. Which should look something like:
b6b4bbfafdacf9e00f4c674ba237193b40347140917946cff0ede3b10dc6ea55 *linuxmint-20.3-cinnamon-64bit-edge.iso
e739317677c2261ae746eee5f1f0662aa319ad0eff260d4eb7055d7c79d10952 *linuxmint-20.3-cinnamon-64bit.iso
27de0b1e6d743d0efc2c193ec88d56a49941ce3e7d58b03730a4bb1895c25be5 *linuxmint-20.3-mate-64bit.iso
4d37e6a57513d2cdb4a8a993f48a54b18e0d41e86b651326f1101c34460c4719 *linuxmint-20.3-xfce-64bit.iso
And then take your .iso file and run:
sha256sum linuxmint-20.3-cinnamon-64bit.iso

Check this output against your downloaded file, it should match. If not, do not install it.
For the ultra-security minded, you can also verify the checksum by using a gpg the gpg key they provide. Follow the official instructions.
Create the VM
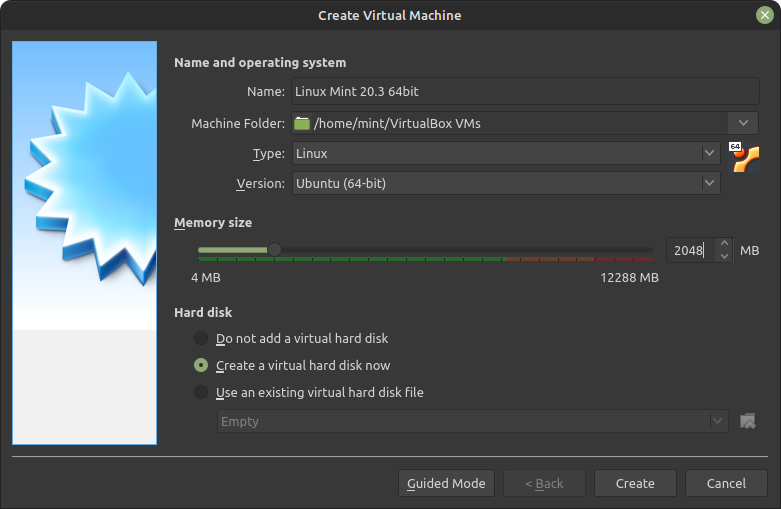
From the menu, click New. Click Expert mode. Enter a descriptive name (e.g. Linux Mint 20.3 64bit). This should automatically set Type to Linux and Version to Ubuntu 64-bit. But if not, select these options.
Memory size is the amount of RAM dedicated to the VM. Use a minimum of 2GB, 4GB is comfortable.
Click create.
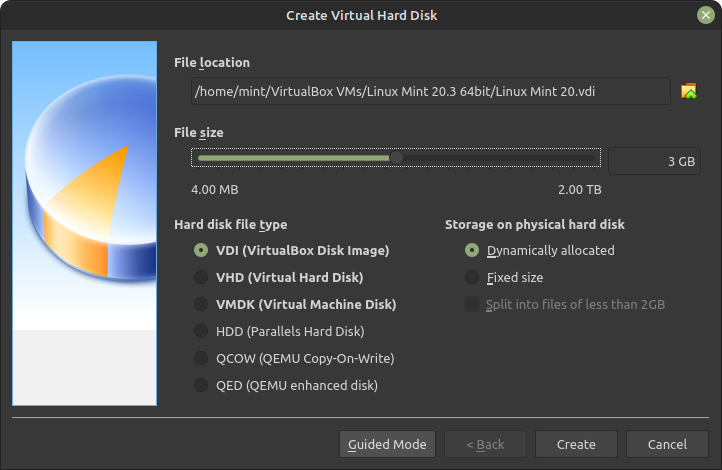
Select a size for your hard disk. I chose 3GB as I am making a Live USB which only has to boot. If you want to install mint, select at least 20GB.
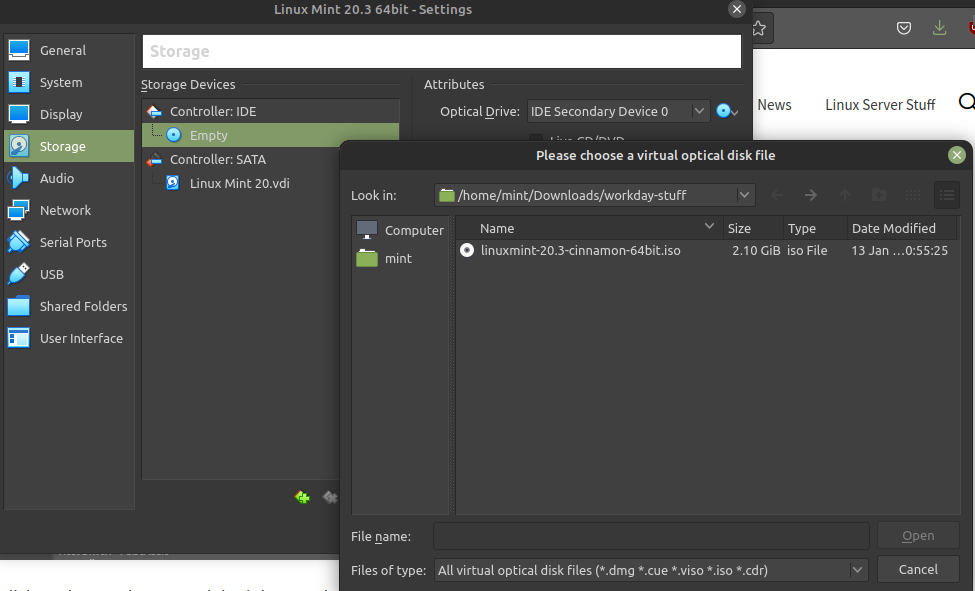
Finally, go to Settings, then the Storage sub-menu. Under Controller, select the optical disc, select Choose a disk file. And then navigate to the location of your downloaded .iso file.
If you followed this tutorial, all your VM files should be at
/home/{username}/VirtualBox VMs/Linux Mint 20.3 64bit. The most important of these is the .vdi file. This is the virtual, expanding hard drive of the VM.
Run the VM
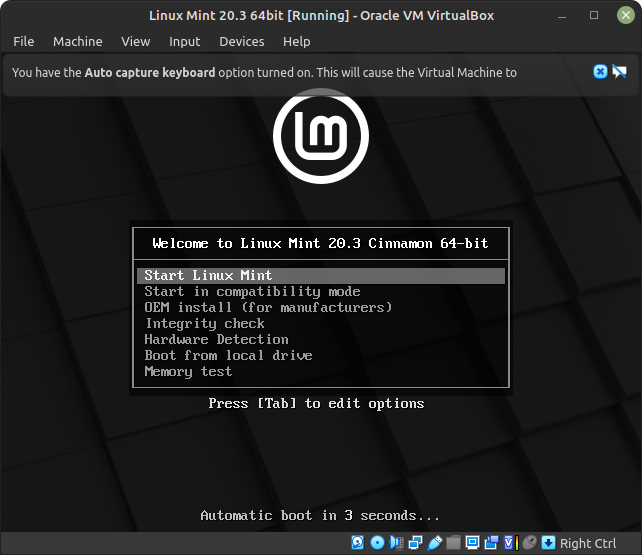
Boot your VM:
Select your VM, then press the Start button. When the splash screen pops up, hit Enter to boot.
Wait for it to hit the desktop and you should see…
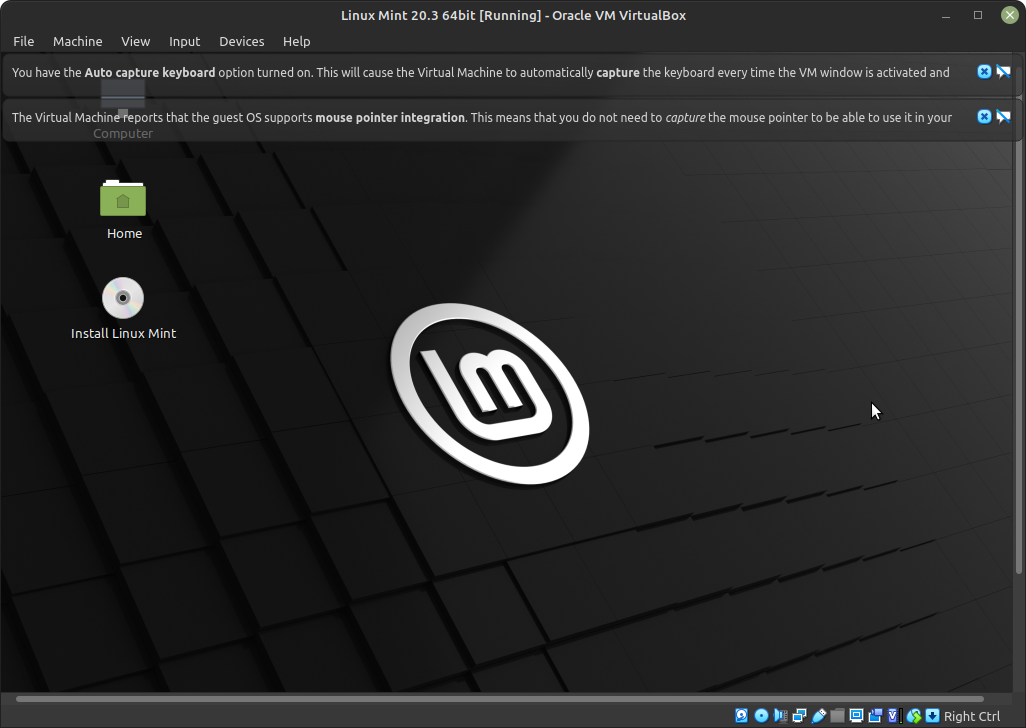
The default settings should pass your internet connection through, so feel free to install, browse the web or customize your OS how you wish!
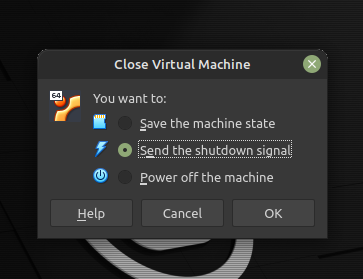
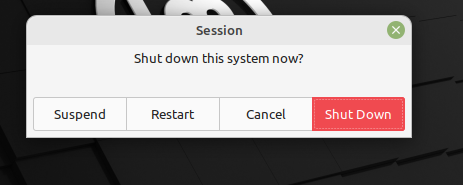
Shutdown your VM safely:
Select File -> Close -> Send the shutdown signal -> OK.
Note that the way in which we booted the machine means it is in Live USB mode. So the VM is reading off the virtual CD image or .iso we gave it and changes won’t be persistent.
Do not worry though, if you need a persistent operating system, just start the installation process (click Install Linux Mint on the desktop) and follow the prompts.
Still confused? Follow the official install docs. The processes are identical as it’s a “real” simulated computer.